Showing posts with label baking. Show all posts

Tuesday, May 13, 2014

Rhubarb Swirl Cheesecake

I'm a sucker for tart and sour flavour sensations, which is why I adore citrus fruits, sumac and vinegar, and I especially like the sharpness of fruit in a dessert. 

Rhubarb can be aggressively tart, I remember my old friend and next door neighbour, Hazel, being given a stalk and a bowl of sugar to dip it in to to make it palatable. 

With the aid of the dullingly sweet cheesecake, some ground ginger and a smattering of caramelised demarara sugar on top this is a grown up but indulgent teatime, or indeed any time, treat.


Rhubarb Swirl Cheesecake

Base

60g wholewheat flour
60g white flour
85g soft butter
60g sugar
pinch salt

Cheesecake mixture

450g cream cheese
150g sugar
3 eggs
1 tsp ground ginger

Rhubarb purée 

100g rhubarb, diced
2 tbsp sugar

40g demerara sugar

Turn oven on at 160C./Gas Mark 3

To make the base, mix all ingredients with electric hand-whisk until uniform in consistency. Line a loose bottomed spring-form tin with baking paper and press the base mixture in until evenly distributed. Bake for 10-15 minutes or until base is golden brown, allow to cool.


Turn the oven down to 140C/Gas Mark 1

Put rhubarb and sugar in a pan over a medium heat until soft, around 10 minutes. Purée in a food processor and set aside to cool.

Use clean electric hand-whisk to mix cream cheese, sugar, eggs and ground ginger until smooth and pour into prepared spring-form tin on top of the base. 


Spoon rhubarb purée into a piping bag and pie a swirl of rhubarb on to the cheesecake.


Bake for 1 hour and a half, then sprinkle with demerara sugar and turn up to 200C and bake for 5 until caramelised, not burned. Checking every few minutes.


Leave to cool. Refrigerate. Serve.

Wednesday, March 19, 2014

Vegan + Gluten Free Chocolate and Black Bean Brownies

One of my oldest friends came to stay this weekend, she’s a vegan and was spending 6+ hours getting tattooed on Saturday, so I knew she’d need something sweet and delicious as a treat after all the pain.

I’ve read considerable amounts about black bean brownies and wanted to experiment once I happened upon said pulses, this conveniently happened on Saturday afternoon. They were the first thing I baked when I returned home because I was worried that they might turn out awful, if they were I would have had more time to make something else. They were delicious! No curious flavour or texture, just some brownies that everyone can enjoy being vegan and gluten free. They’re also easy to make sugar free, I added a few tablespoons of vanilla sugar for flavour.

I had questioned as to whether other beans could be used to make these or other brownies, but didn’t experiment, my next plan will be to see if I can make blondies with a white bean and maybe red velvet brownies with a  red bean. I think you understand where I’m coming from here. If you do experiment, let me know, I’d love to see how they turn out.

The brownies keep for a good 3 – 4 days in an airtight container but if they last 24 hours you’re doing something wrong.

Vegan + Gluten Free Chocolate and Black Bean Brownies


1 tin black beans
40g cocoa powder
40g oats
40g vanilla sugar
40g coconut oil
75g agave nectar
4tbsp almond milk
1/2 tsp baking powder
100g dark chocolate, finely chopped

Preheat oven to 180C/Gas Mark 4.

Combine all ingredients but the chocolate and the almond milk in a food processor until smooth. Add almond milk along the way to reach a wet cakey like consistence.

Stir half the chocolate and pour into a greased square tin, then sprinkle the rest of the chocolate on top.

Bake for around 15 minutes or until a skewer comes out clean.

Leave to cool for at least 10 minutes before cutting.

Portion into 12 or less and enjoy.


Tuesday, September 3, 2013

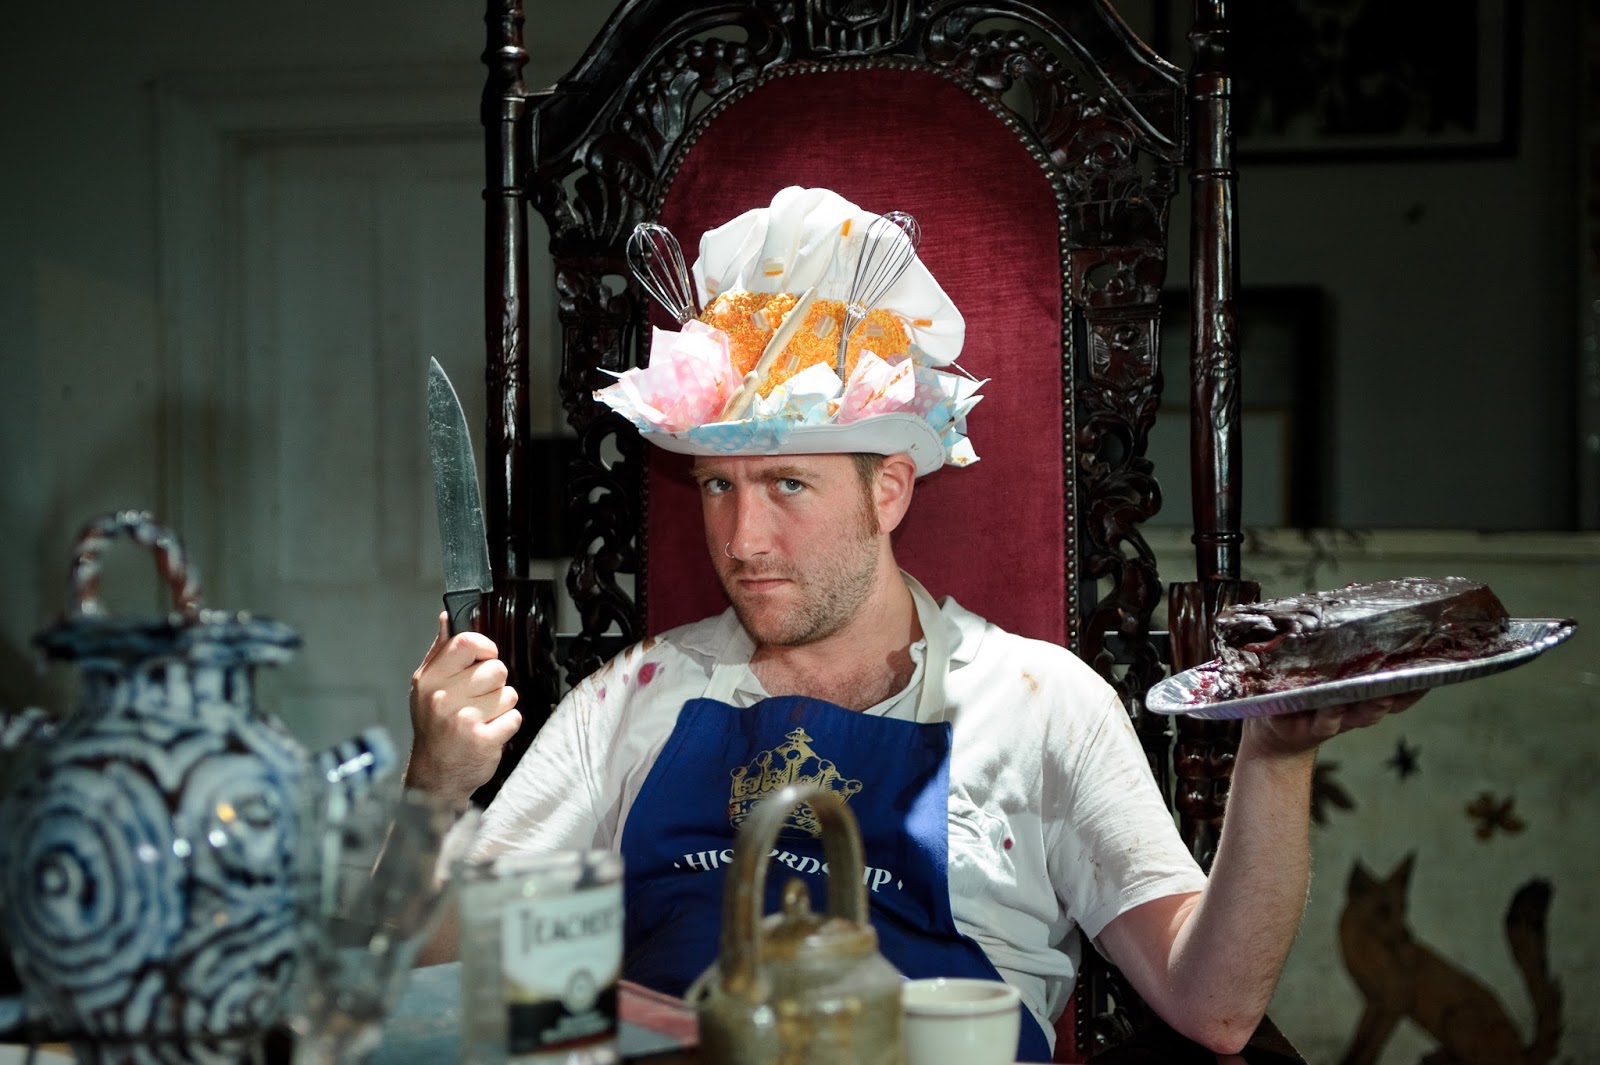
Bleeding Beetroot Chocolate Cake for 'Labolis::Threshold'

Today I will be making 11 cakes. 11 of the same cake – I’m not totally insane. Labolis has been a constantly evolving and beautiful beast, part immersive theatre, part scavenger hunt, part role playing game and part art kaleidoscope. The amazing Ultra Violets have the fifth Labolis this weekend and it is gearing up to be the best yet.
I was asked to play a ‘Mad Chef’ and create something suitably surreal for the participants to eat during their experience. After some conceptual clambering I settled upon a bleeding beetroot chocolate cake. Something suitably delicious, with an earthy note that is visually arresting was a hard spec to follow but I made it in the end.
This post is as much about the recipe as it is about my trials and tribulations over the day of baking 11 cakes. I’ve already decided that the blood filling (red fruit coulis, maple syrup, treacle and red food colouring) and the ganache icing will be made in one batch so i can concentrate on the conveyor belt of cakes. I’m hoping the weather is suitably damp and cool in Manchester so I can get some respite outside away from the kitchen inferno.
The pictures should be pretty kick-ass too, the kitchen I’m working in has windows. Crazy what happens when you live away from London, the mod cons you get.

After this weekend I’m aiming to be a better actor, performer and mass caterer – although one out of three would suit me well.

Bleeding Beetroot Chocolate Cake


Cake


200g dark chocolate (at least 70% cocoa solids)
200g softened butter
135g plain flour
1 heaped tbsp baking powder
3 tbsp cocoa powder
1/2 tsp ground ginger
250g puréed cooked beetroot
5 eggs at room temperature - separated
200g caster sugar

Ganache


200g dark chocolate (at least 70% cocoa solids)
200ml double cream
4 tbsp golden syrup

Filling


200g fresh or frozen raspberries
1 tbsp treacle
3 tbsp maple syrup
50g icing sugar


heat the oven to 180C then grease and line two 20cm spring form tins.

Whisk egg whites in stand alone mixer until at the stiff peaks stage.

Meanwhile whisk egg yolks until pale and fluffy and mix in with beetroot purée.

Heat chocolate in a bowl over a pan in boiling water making sure the bottom of the bowl doesn't touch the water directly. Once melted add the butter, cubed, and stir until melted and glossy. Leave to cool for a few minutes.

With the mixer running tip the sugar slowly into the egg whites and mix until they resemble a good marshmallow mix.

Add the cooled chocolate mix to the beetroot and egg yolk mix and fold in thoroughly. Sieve in the flour, cocoa, ginger and baking powder and fold in thoroughly till no four can be detected in the mix. Finally add the egg whites and fold through gently with a metal spoon until you reach a smooth mousse like consistency with volume.

Bake for 30 mins and allow to cool while you make the filling and ganache.

For the filling process the raspberries in a food processor and pass through a sieve to remove seeds. Add raspberry purée, syrup, treacle and icing sugar back to food processor and process for 5 minutes and refrigerate until using.

For the ganache tip cream, chocolate and syrup into a pan, heat slowly, stirring continuously until glossy. Leave in pan to stay warm for easy pouring.

Tip and spread filling over base cake and top with remaining cake. Pour over ganache and smooth over with palette knife.

Eat. Scream, Run....


Monday, June 24, 2013

Peanut Butter and Banana Muffins

I know, I know, you'd think all I do is bake... 


Well these bad boys are a work in progress - this batch is the one i've been happiest with so far. I was aiming for a muffin you could grab and eat for breakfast that would be sturdy enough to travel to a festival but not dry and mealy. 

The addition of the low fat yogurt definitely helps keep the muffin moist, whereas the oats keep it filling and sturdy, in case of any squishing they will retain some structural integrity. imagine if you used whole wheat flour they would be even more dense but i didn't have any and wanted something soft, I fear the whole wheat flour may have made them a but claggy. I'll report back when I continue my experiments.

These can easily be made vegan with some stewed apple in place of the eggs and some non-dairy yogurt. I doubt they will last very long, they may even get snaffled on the journey to Glastonbury, I hope you enjoy these versatile little buns!


Peanut Butter and Banana Muffins


30g butter
150g crunchy peanut butter
150g brown sugar
2 eggs
150g plain flour, sifted
1 tablespoon baking powder
120ml low-fat yogurt
50g rolled oats
juice of one lemon
2 ripe bananas, mashed

Pre-heat oven to 160C/Gas Mark 3

Cream sugar, peanut butter and butter for 5 minutes with hand held electric mixer, scrape down the sides with a spatula.


Add one egg at a time, mixing thoroughly each time and scrape down the sides.


Fold in sifted flour and baking powder, then stir in the yogurt, banana and oats one by one. Finally stir in the lemon juice. The mixture will be quite sloppy, don't worry.


Line a 12 hole muffin tray and fill each about 3/4 of the way.


Bake in the middle of the oven for 25-30 minutes or until golden brown.


Leave to cool on a wire rack and eat when the bottom stops being squidgy.


Sunday, June 23, 2013

Garlic and Sea Salt Focaccia

Trial and error brought me to this recipe, one that I am particularly pleased with...


As Squirrelface is Italian, when i try an Italian recipe it is more important that i get it right, i generally aim for the Mamma standard. If it is as good (or even very-nearly-almost as good) as Squirrelface's Mamma I consider it a success. This recipe was bestowed with the 'as good as Mamma's' so I was very pleased and have to say it's really quite amazing just out of the oven but best consumed within 24 hours - if it lasts that long.

I decided to make it simple with garlic and sea salt as the main flavours but focaccia is so versatile you can add almost anything savoury to the top and it will yield tasty results. Other favourites are rosemary and caramelised red onion, roasted tomato and thyme or sinful cheese and bacon.

Garlic and Sea Salt Focaccia


500g strong white flour, sifted
350ml tepid water
100g olive oil
7g sachet dried fast-action yeast
2tsp table salt
1tsp wet sea salt
4 fat cloves of garlic, sliced very thinly

In a large bowl mix flour, table salt, yeast, 300ml water and 80ml olive oil with a knife. Scrape the sides and mix until you have a wet dough, add more water if needed. The dough should NOT be liquid - it should be just manageable.

Lightly oil a work surface and your hands, then knead for 5-10 minutes until stretchy and glossy.

Lightly flour a baking dish and add the focaccia dough, pushing it out to the sides evenly.

Set the oven to 200C/Gas Mark 6 and put the baking tray on the hob above the oven with an oiled piece of cling-film over the top, oil side down and seal air tight.

Wait until dough has risen and doubled to around twice original size, then take cling-film off, oil your thumb and lightly make dents in the dough from outside to in. 

Push slivers of garlic in to the dents then scatter with sea salt and bake for 25-30 minutes until golden.

While baking, put remaining garlic and 20ml olive oil in a small heavy bottomed pan and warm through until garlic is golden. Separate garlic and oil with a sieve. 


When focaccia is done pour over the warm oil and scatter with the golden garlic and leave to warm in the tray.


Excellent cut in to wedges when hot and moreish, with antipasta or as an aid to soup.


Thursday, May 9, 2013

Double Lemon Drizzle With Mascarpone and Lemon Curd Filling


Indulgent celebration cake for close friends and family


Big weekends come along once in a  while, last weekend was one of these. I headed to Nottingham to celebrate two of my best friends’ birthdays and promised a cake. So on the Saturday morning, after the Friday night dancing to the jazz-swing sounds of Alligator Gumbo at The Malt Cross drinking Harvest Pale, I made this cake. This was a hung-over cake. A cake that wasn't very pretty and still had its dressing gown on. But it was a moist and decadent cake.

Even though I enjoy baking and do it a lot, I've never really been one for perfectionism, especially when it comes to presentation, so a delicious, if slightly demolished looking cake is just as good as a manicured and spray-tanned cake. I think part of the problem was that I used two silicone tins, didn't line or grease them and had them on the same shelf of a smallish oven. Like I said, I was hung-over.

This cake is actually the beginnings of a cake that will have to be perfect when it comes to taste, construction and presentation m- my friend Vinca and I are afforded the great honour of making three very special cakes for our friends’ nuptials – and this lemon drizzle monster is just a jumping off point. I blended the Mascarpone and the lemon curd (which was shop bought) but think for effect it might be nicer to have the curd on top of the rich cream cheese, dribbling down the side of a 3 or 4 tiered cake.

NB. Line and grease your spring form tins.


Double Lemon Drizzle With Mascarpone and Lemon Curd Filling


250g unsalted butter
350g caster sugar
4 large eggs
zest of 3 lemons
350g self raising flour
pinch of salt
80 ml milk

Cream the butter, sugar and lemon zest together until pale and fluffy.

Add the eggs one by one till combined thoroughly. 

Sift in self raising flour and salt.

Stir in milk and add an extra tbsp at a time if too stiff (the batter should be firm and not sloppy)

Pour batter into 2 greased and lined spring-form tins.

Bake for 35 - 45 minutes, insert a skewer to test if it is cooked in the middle.


Drizzle


Juice of 3 lemons
200g caster sugar

While the cakes are baking put juice and sugar in a heavy bottomed pan and dissolve the sugar on a low heat and reduce if you want a thicker syrup/drizzle.

Prick the cakes while still in the warm tins and pour half the drizzle over each and wait till they cool before removing.


Mascarpone and Lemon Curd Filling


200g Mascarpone
100g lemon curd

Whizz together and spread on whichever cake you designate the bottom,

Top with the other cake.

Eat greedily.


Monday, May 6, 2013

Mum's Carrot Cake Bars


Food evokes such a sense of nostalgia


My mum used to make my school trousers, and reinforce the knees with extra fabric because I’d fall over so much. My brother and I weren't allowed fizzy drinks unless we were on holiday and our packed lunch would always come with a home baked treat. This was partly down to being thrifty and partly down to knowing that home baked treats taste so much better than supermarket fare. You have to remember this was the 80s, when a Club was the height of sophistication in the playground.

Moving in to secondary school my mum no longer made my trousers or reinforced my knees, I did get bought my first ever pair of Doctor Marten’s, which doubled as school shoes and my pathway to after-school rebellion. Soon my packed lunches gave way to dinner money that got spent on 10p crisps and cigarettes, innocence lost.

A few years ago my mum photocopied all her old recipe cards and I was transported on a nostalgia trip, so many different things that used to appear in my lunch-box were now attainable again, but made by me. Over the course of this blog I will delve through these history bites and give you an insight into my childhood along the way.

I decided to make these  carrot cake bars with a lime/yoghurt icing instead of the cream cheese prescribed as I wanted to take them in to work and was aware one of my colleagues doesn't tolerate cream cheese icing (I know, weirdo). I'm happy to modify and mix I up and compromise when I make food for others, my mum did
the same for me when I was going through my chocolate-spread-vegetarian phase…. A story for another time, maybe.

I substituted the cinnamon, nutmeg and cloves for ground ginger, any warm ground spice will work well. Obviously you can substitute the dried fruit and nuts to your taste. Everything is adaptable. This is why i've given you the two icings, one is my mum's and one is mine.

Let me know if you've resurrected any old family recipes or been passed any down.

Mum's Carrot Cake Bars

200g plain flour
1 1/2 tsp baking powder
1 1/2 tsp ground cinnamon
1/4 tsp bicarbonate of soda
1/4 tsp grated nutmeg
1/8 tsp ground cloves
3 eggs
200g grated carrot
175g caster sugar
165 ml vegetable oil
50g raisins
75g chopped walnuts

Set the oven to 180c/Gas mark 4

Sift plain flour, baking powder, bicarb, spices in to a bowl.

Combine eggs, carrots, sugar and oil in a large bowl and mix well.

Add flour mix gradually mixing with metal spoon or spatula until thourouhly combined. 

Mix in raisins and walnuts.

Spread batter into 15 x 10 x 1 tin, ungreased and bake for 25 - 30 minutes - check with a skewer.

Cool on a wire rack.


Lime Yoghurt Icing

2 tbsp Greek yoghurt
1 tbsp lime juice
zest of 1 lime
200g icing sugar


Cream Cheese Icing

75g cream cheese
50g butter
2 drops vanilla essence
225g icing sugar

Either icing is the same, chuck in a bowl, whizz with an electric mixer till combined.

Don't ice the cake until it has cooled.

Cut into 8 - 12 bars depending on how greedy you are.

Monday, April 22, 2013

Dirty Chocolate and Caramel Cheesecake

A low fat failure becomes a big fat success

On Wednesday evening I tried to make some low fat chocolate biscuits out of egg white, walnuts, dark chocolate, sugar and cocoa but failed pretty miserably. They were bitter and stodgy but I didn't want to waste them, so I decided to turn them into cheesecake crust and thought up this Dirty Chocolate and Caramel Cheesecake for Squirrelface's birthday.

I do attempt to make slightly healthier things when I'm baking but as this was something of a celebration cake  I decided to go all out and create something so calorific and delicious that it will possibly only get made once a year. I might train for the London Marathon for next year and use it for carb loading. I should really have gone for a run today but my kitchen got the better of me.

One thing you must remember is to leave the cake in the fridge until the cake is completely cold or the caramel will squidge out form underneath the cheesecake. Or alternatively use more biscuits and have the base come up the sides as well, I didn't have enough bitter biscuits.

This is a gluten free creation, the biscuits I attempted to make were Gizzi Erskine's Beacon Hill Cookies so if you have better luck, let me know (I didn't have cream of tartar).

Salt the caramel if you wish, I didn't. Vogueish foodstuffs annoy me.

Dirty Chocolate and Caramel Cheesecake


For the base


150g chocolate biscuits
60g butter

For the cheesecake:

200g dark chocolate 
500g cream cheese
175g caster sugar
3 large eggs
150ml sour cream 

For the caramel

125ml water
125ml Golden Syrup
300g Demerara sugar

90g unsalted butter

250ml double cream

Blitz the biscuits with the butter in a food processor and push into the base of a loose bottomed spring form tin.


Preheat the oven to Gas 4/180C

To make the caramel put all ingredients but the cream in a heavy bottomed pan and bring to the boil. Reduce the heat and allow to bubble away for 5-10 minutes until you're happy with the colour.


Take off the heat and pour in the cream, then put back on to a low flame and reduce until you reach your desired consistency, another 5 minutes should be fine.


Pour the caramel into the spring form tin and place straight in the fridge.

For the cheesecake mix all ingredients aside from the chocolate to a batter-like consistency.

Put the chocolate in a heatproof bowl over a boiling pan of water without the bottom of the bowl touching the boiling water. The chocolate should melt within 5 minutes. 

Pour the chocolate into the batter and mix until combined.


Remove the cake tin from the fridge and pour in the cheesecake batter.

Bake for 50 mins and allow to cool thoroughly before removing the tin.

The result is a light cheesecake topping a dense round of caramel. If left in the fridge overnight remove from the fridge at least an hour before serving.


Friday, April 5, 2013

LIME MARMALADE DRIZZLE TYPE-CAKE


I'm Washing Up This Evening.....


From the chaos of unpacked bags and boxes I’m starting my food blogging.

The first thing i did after moving my stuff into mine and Squirrelface’s new Peckham flat was sort out the kitchen. Chaos isn’t chaos when the kitchen is in order.

I like baking with fruits and vegetables – they give a naughty treat a slightly healthy hue – and this evening I’m making a lime marmalade drizzle type cake.

I’m not much of a recipe follower when it come to savoury things, I like to let my instincts kick in  but when it comes to baking I know it’s science as much as it is art. When I adapt, I tweak flavours, not measurements. I’ve had enough cakeccidents being gung-ho and have learned my lesson.

This cake can, I imagine, be made with any other kind of marmalade and citrus fruit combo you like, mix and match etc. I’m not prescriptive, I would encourage you not to be either. Lime marmalade is evocative of my maternal grandparents and triggers happy culinary memories, the heady citrus tang of the fruit itself is possibly my favourite flavour, savoury or sweet. The Chinese don’t have the monopoly on sweet and sour.

I particularly love a thick shred marmalade, which adds an emerald glisten to the top of the cake, not unlike candied peel.

LIME MARMALADE DRIZZLE-TYPE CAKE


DRIZZLE

  • 75g lime marmalade
  • juice of 3 limes
  • 2 tbsp icing sugar

Preheat oven 180C/Gas 4. Grease and line a loaf tin.

Beat together the yoghurt, vegetable oil, lime zest, caster sugar and eggs until well combined and glossy.. Sift the flour and baking powder in and mix until no lumps are visible..

With the help of a spatula, pour the mixture into the loaf tin and bake for about 45 minutes. Do the skewer test to check it comes out clean.

Whilst the cake is baking warm the marmalade, lime juice and icing sugar until the marmalade melts.

Take out of the oven, use the skewer to poke holes in the top of the cake and leave in the tin. Drizzle the marmalade mixture over the cake and set aside to cool completely.

Remove the cake from the tin and eat with friends (or in my case, Squirrelface).